
To be clear, nothing will really ever turn out the way you first expect it. But there’s nothing more frustrating than imagining something absolutely spectacular and being excited about a project, only to finish it wishing you were able to make it “look like what you originally envisioned.”
So what do you do? I think as design students we have to be smart about the production, which ultimately takes time, trial and error and lots and lots of practice.
My best projects were always the ones where the method of production I chose added to the strength of the piece. If you envision type that is actually gold, and then substitute that for gold-yellow ink printed on paper, there’s obviously going to be a deficit in your expectations. If you are subconsciously imagining something that is actually letterpressed, but don’t take the time to access a letterpress machine, then your vision needs to change to accommodate means of production that you can actually attain. You should make sure to calibrate your vision with your method of production.
One thing I wished I had known sooner was that I could pay for things to be done the right way. It's more legwork, but the payoff is having your design printed and made perfectly. Plus, it saves you the time and hassle of doing it yourself. If it makes sense for the project and your budget—go with a professional.
The best design students take advantage of the resources that they have access to, even if it’s completely foreign and new. Find local people that are able to help students like you make *just one* screenprinted poster for your portfolio. Or *just one* letterpressed invitation. Go after the tools and methods that are going to help you accomplish your project the right way—not the sorta-kinda way. There's a big difference.
An Interview with:
Shannon Coffey (2017 grad)
1.You seem to have a really good handle on craft and production in general. What’s your approach?
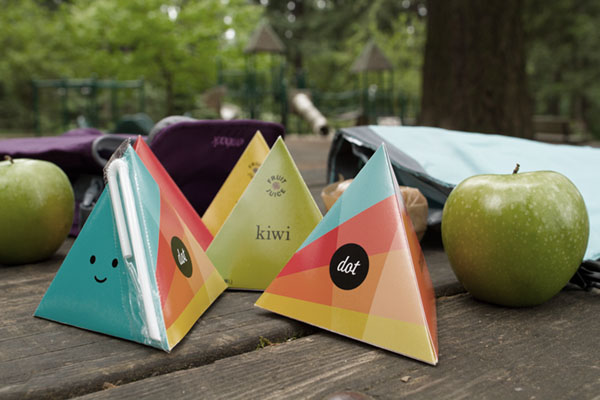
It’s all in the details. I think I found templates online for a lot of what I built, but for every one I had to tweak/customize them because they weren’t correct or accurate. I also made sure to approximate real world versions as closely as possible. Every detail of your piece is critical for bringing authenticity, whether it’s an album cover, beverage package, chocolate bar, postage stamp, movie poster—they have more of a real feel if you get those little details right.
I also try to research materials (paper, cardstock, binding tape, rivets, etc.), and even design to a material if it makes sense. And tons of print tests. Tons! I burned through so much ink on each of my projects leading up to Review, but it really informed the work. You don’t want to skimp on that. Make sure you have backup ink cartridges too. 2:00am and running out of ink before a deadline where you then have to hustle over to Lloyd Center FedEx (open 24/7!), pay for prints, and then back home to trim and assemble is really no fun. Well, it’s a little fun. ;^)
Be sure to explore all the nooks and crannies of your local art and hardware stores too, you’d be surprised what kind of inspiration you’ll get from seeing lots of different materials and methods of attaching things together.
And lastly, if you can manage it, do a lot of assembly tests. Work with paper mockups, then move on to card or whatever is your final material. The more bugs you can work out early the better. It will give you time to redesign a piece to work around a flaw in a material. Also try to be rested before you do a final assembly. Again, 2:00am is a great time to slice a finger or destroy a seam with a bad glue join. ATG glue guns (arts stores have them in pocket sizes, and varying stickiness) are a lifesaver when you know you’re going to have to place and reposition tricky elements. This was key on my album cover and beverage package projects.
2.Commissioning pieces can be spendy, yet sometimes not even worth it. How do you know when to go with a professional?
You probably mean how a spent $150+ on my portfolio cover. ;^) I wanted to have a hardcover, clothbound book feel to my portfolio, but new I wouldn’t have time to build that myself and get all the other pieces done in time. So I found a great place in LA that does custom builds, and went the extra step and had them emboss my name on the cover. It looks amazing, is great quality, and should last forever. I was okay with the price because it’s a commemoration of a ton of hard work, so why not wrap it in something special? And they did great work, so it just brought everything up a notch in presentation.
3.What’s your advice on overcoming issues with craft/production? Any specific lessons you’ve learned?
A lot of roadblocks come from being too tired to solve the problem in the moment. Sleep on it if you can, and the solution should come to you. Also, it really helps to ask around for tips/suggestions—you’d be surprised how a handy friend or relative will have a crazy perfect take on how to execute something you were literally banging your head on a desk trying to figure out. Instructors too! They love to help problem solve this stuff.
As for lessons, banking enough time to build a piece is key. Learn what you’re estimating multiplier is. If you always think it’s going to take 3 or 4 hours but it’s really all night and into the morning, then you need to 3x that estimate next time. So instead of Sunday night you should start on it first thing Friday. That kind of foresight helps you deliver at a higher level, because you now have time to work out the kinks, go back and tweak files and reprint parts that aren’t working. You have time to drive back and forth to the printer, or run back to the art store for more supplies (at a time when they’re open), or even time to wait for your inkjet to physically print the job out. All those little bits of time add up to really long nights if you don’t prepare ahead. So the biggest thing for me is to start early so I have time to fail and fix along the way.