Audacity Editing Project
Current thru version 2.0.3
top instructions
Resources:
Script: C W E Q I M V A P F T K J Z U B R D H X G O S N Y L
Project Description
You are given an audio recording of a voice reading the letters of the alphabet in random order. You are asked to:
1) Edit the recording, putting the letters into alphabetical order
3) Pan the letters alternately left and right
4) Add an effect to the letters panned right
5) Create a stereo mix of your track
6) Create an mp3 of the result
Before You Begin: Read the Audacity Tutorials
Audacity is free software with a surprising number of features. It can be installed on both PC and Mac, and is installed on all the computers in the Music Technology Lab.
Before you begin the assignment, access the Audacity Info page, and check out some of the options--there are links to the Audacity website, and to the page that allow you to download the application. Note that there is a link to our Recording Tutorial, too.
Click on the link Audacity Online Tutorials. On the resulting page, read the tutorials in the Basics and Editing for Beginners sections. You don't need to do any of the work they suggest, but read thru and familiarize yourself with these basic concepts before moving into this assignment.
Note: The assignment is meant to be done on the Macintosh computers in the Music Technology Lab. You are welcome to do the assignment somewhere else, but the instructions may need to be translated slightly on a different system.
Part 1: Set Up Your Work Folder and Files
•On a Music Technology Lab Mac, close all applications (except your browser), and make sure the active application is the Finder.
The active application is named at the left of the top menu bar.
•If you have your own work folder in the Student Work folder on your computer, open it and keep it active.
•Access the File menu, and select New Folder.
This will create a new untitled folder in the active window or desktop.
•Rename the new folder Lastname.Firstname.Alphabet, using your last and first names in the folder name.
This is your project folder. You will want to keep all the files for this project in this folder.•At the top of this page, locate the link to the Voice Audio File and download it to the project folder you just created.
To do this, hold down the control key, then click on the link, resulting in a "contextual menu." Choose Download Linked File As... and, in the resulting window, navigate to your project folder. Once there, click Save, and it will put a file called alpha.aif into your project folder.
On a Mac, control-click is the equivalent of right-click.
•Open your project folder and find the icon for the alpha.aif file. Also, locate the icon for the Audacity application in your Dock. Carefully drag the alpha.aif icon to the Audacity icon. When the Audacity icon highlights, release the mouse. Audacity will open, and a waveform for the audio file will show.
There are several ways to open and create files on a computer. This method, dragging a file icon to an application icon, is a safe and reliable method.
You may get a Warning window at this point. If so, select Make a copy of the files before editing or the equivalent.
•Make sure Audacity is the active application. Access the File menu, and select Save Project.
If you get a warning window, just hit the OK button.
•In the Save window, name the file Alphabet Edit, and navigate to your project folder if necessary. Make sure that in the bottom part of the window, the menu shows the Format as Audacity projects. Save the project there along with the alpha.aif file.
You might notice that after saving, Audacity creates an additional folder in your work folder called FileName_data where various files created by the project are collected. Make sure this folder stays intact and in your work folder.
•With Audacity as the active application, find and click the play button in the Audacity transport window, and make sure you can hear your audio file.
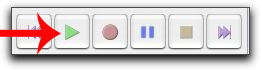
The audio is the alphabet in random order.
C W E Q I M V A P F T K J Z U B R D H X G O S N Y L
Now we want to add a new track to our project where we can put our edited letters.
•From the menus at the top of the window, access the Tracks menu, and select Add New > Audio Track to add a new audio track to your window.
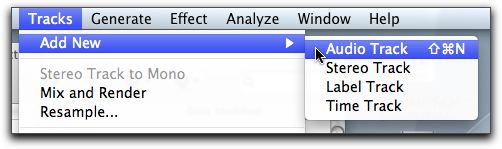
In other words, access the Tracks menu, then select Audio Track from the Add New sub-menu.
Notice that the shortcut to add a new track is Shift-Command-N.
If you don't find the Tracks menu, make sure Audacity is the active application.
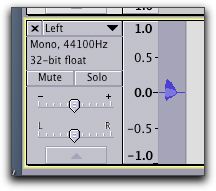
•At the left end of the new track, find and click on the track's name. In the resulting menu, select name, and in the resulting window, rename the new track Left.

•Access the File menu, and select Save Project to save your work.
Note that for many menu items, the keyboard shortcut is listed to the right of the selection. For example, you can save your file at any time by holding the Command key (the key to the left of the spacebar) and hitting the letter S. We would describe the shortcut as Command-S. Incorporating shortcuts into your work will speed your work flow substantially.
Part 2: Re-Order the Letters
When you access audio in an audio editor like Audacity, the audio file is not "contained" in the Audacity file itself; rather Audacity "points" to this separate audio file. When you edit the audio in Audacity, you are not altering the original audio file. Instead, you are simply choosing different ways for Audacity to refer to this original file. The "edits" are what is saved with the Audacity file.
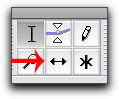
Before continuing, make sure you have read the tutorials mentioned above, and be able to identify the buttons used to select tools.
•In the navigation section, click on the Selection Tool to highlight it.

•Using the list of random letters at the top of the page, play through the file and locate the portion of the file that represents the letter A.
•Using the Selection Tool, drag over that portion of the waveform.
The portion will highlight, and you can audition it by hitting the play button (or spacebar).
•With the audio for the letter A selected, go Edit > Remove Audio or Labels > Cut (Command-X) to remove that portion of the audio at the edges of the selection.
The soundbite has been removed from the top track, but its parameters are retained in memory in case you now want to paste those parameters into a new track, which you do...
•In the Left track, click anywhere in the track.
Notice that the left panel for the track highlights to show the track is selected as the destination for the next instruction.
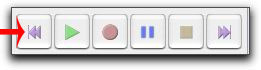
•In the navigation section, click the Skip to Start button to put the cursor at the start of the track.
•From the Edit menu, select Paste (Command-V).
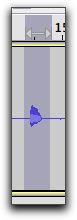
The audio waveform representing A will now appear at the far left of the Left track.
If you hit play at this point, you will hear A coming from the Left track.
•Now in the upper track, find and select the letter B.
•Once selected, go Edit > Remove Audio or Labels > Cut (Command-X) to remove it from this track, and put its parameters into the short-term memory.
•In the Left track, click anywhere to the right of the current waveform, and go Edit > Paste (Command-V).
The letter B audio will now appear where you pasted it. But we want to put the clip adjacent to the letter A...
•In the navigation section, click on the Time Shift Tool to highlight it.
•Using the Time Shift Tool, click on the letter B clip and drag it to the left until it is adjacent to the letter A clip.
•Now continue thru the alphabet, removing files from the top track and pasting them, in order, into the Left track.
Note that at any time, you can undo your previous step by going Edit > Undo (Command-Z). Repeatedly selecting this item will walk back through each step of your project until ay previous error is corrected. Bear in mind you can also step forward by selecting Edit > Redo.
Don't forget to periodically save your file!

Alternately, you could highlight each letter using the Selection Tool, then go Edit > Clip Boundaries > Split (Command-I). This will separate the letter out into its own region. You could then use the Time Shift Tool to move it down into the Left track in the proper order. Both the method described above and this method will achieve the same result. The only difference is that the top track will have spaces in it in the method described here.
If while editing, two or more of your letters become "joined" (i.e. there's no separator line between them), access the Selection Tool, then click between the two letters to place the vertical line there. The go Edit > Clip Boundaries > Split (Command-I) to create a single split.
Part 3: Create New Track and Set Pan Controls
•Using the instructions listed above, create a new track and name it Right.
•In the left-hand panel for the Left track, find the Pan control--a slider between the letters L and R.
•Slide the Pan control for the Left track all the way to the left.
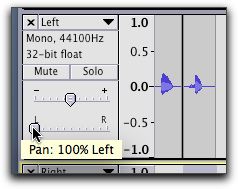
This sends the audio from the Left track out only through the left-hand speaker.
•Now pan the Right track all the way to the right.

Part 4: Drag Audio Clips to Alternate Letter
•If you have not already done so, engage the Time Shift Tool from the navigation section.
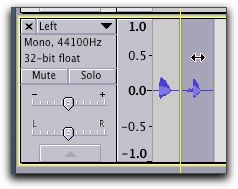
•In the Left track, click and drag the second clip (B) directly downwards into the Right Track.
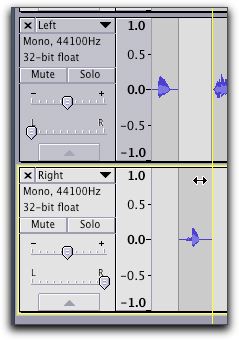
As you drag the clip into the destination, notice a vertical yellow line shows you that the clip "lines up" with the clip on the left or right from the original track.
•Continue through the project dragging alternate clips to the Right track to create a "checkerboard" between the two tracks.
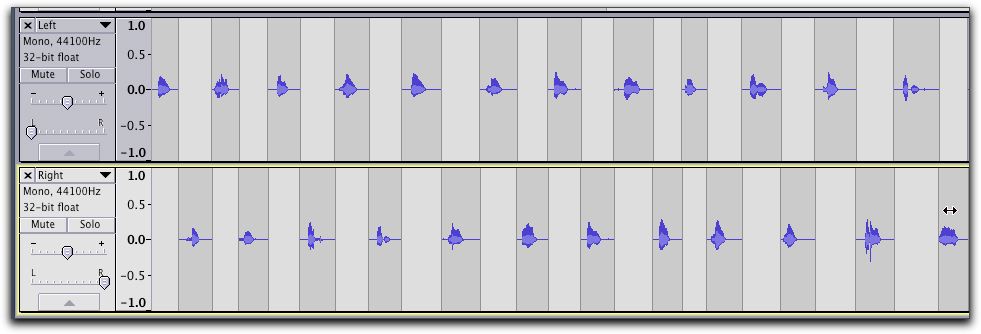
If you rewind and then hit Play, you should hear A come from the left speaker, and B from the right speaker. If you don't, check your Pan controls. If you have any residual noise on the top track, click its Mute button to silence it.
Part 5: Add An Effect To The Right-Hand Track
Different audio editing applications provided different ways to add "effecs" to the audio in their tracks. In some cases, the application will have a "mixing board" into which one can inser a t "plug-in"into a track that imposse an effect on any audio in that track.
In Audacity, one adds effects directly to the audio waveforms themselves.
To do this, one must first select one or more waveforms, then select the effect one wants to add.
•Click somewhere in a blank area of the left-hand panel of the Right track.
This "selects" all the audio in that track. The track will highlight, along with all of the waveforms in the track.
•With the waveforms in the Right track highlighted, access the Effect menu, and select Echo.
•In the resulting window, set Delay time (in seconds) to 0.2, and Decay factor to 0.5.

•Click Preview and listen to the result of the effect.
•Now click OK to close the window and process the effect.
Notice that the shape of the waveforms has changed to reflect the imposition of the effect.
•Hit Play to listen to how the effect works with the other track.
If you like that effect, simply go to Part 6. However if you want to do something different, go Edit > Undo (Command-Z) to undo the effect, then, with the waveforms still selected, choose something different from the Effects menu. Experiment with the new effect's parameters, and click Preview (if that option exists) until you get what you want. Hit OK to apply the effect.
Destructive Effects
In Audacity, effects are applied "destructively," meaning that a waveform for the effected audio replaces the original waveform.
If you don't like what you hear, you can always go Edit > Undo (Command-Z) to go back to the previous waveform. However, once you have gone on and done some other task, you can't change an effect previously added.
Part 6: Export and Distribute
•Make sure nothing is selected in your project.
If something is selected, click anywhere in a blank area to deselect everything.
•Access the File menu, and select Export.
•In the resulting window, name your file Firstname.Lastname.Alphabet.mp3 using your first and last name.
Notice that you are giving the file the extension .mp3. This is important. Some applications, e.g. browsers, use the extension to identify the file type and know how to handle it. If you don't add the extension to your file name, Audacity will complain when you try to save it.
•Navigate to your project folder.
•From the Format menu at the bottom of the window, select MP3 Files, then click Save.
•The Edit Metadata window will appear. Enter information if you want.
One feature of mp3 files is that you can save information about the file that other applications and users can access.
•When ready to save, click OK.
If you get a warning dialogue saying your tracks will be mixed into a stereo file, click the box next to "Don't show this warning again", then click OK.
An mp3 file should appear in your project folder.
MP3 Codec
An mp3 file is a "data compressed" audio file format. To create an mp3 from a different audio format requires a piece of software called a "codec." There are a couple of different versions of these codecs, and they can be acquired for free, but they have to be installed separately from Audacity. Once installed, you have to tell Audacity where it is on your hard drive.
In the Music Technology Lab, the codec we are using is has this file name:
libmp3lame.dylib.
We downloaded this file (for free) put it in this location: main hard drive > Library > Application Support > audacity (in other words "on the main hard drive of the computer, open Library, open Application Support, open audacity").
We then told Audacity where to find this file, by going Audacity > Preferences to open the Preferences window, then selecting Libraries from the left column. In the resulting view, to the right of MP3 Library, we clicked Locate, and navigated to the location mentioned above. So when you create an mp3 file, if it saves as described above, all is well.
However, if you are on a Music Technology Lab computer, and try to save as mp3, you may get a dialogue asking for the location of an mp3 codec.
If so, just click Browse, locate to the location mentioned above, select libmp3lame.dylib, and click OK. Your mp3-save should proceed properly.
On a different computer, click Download, and follow the instructions on the resulting web page. This is tricky, but with care you may be able to sort it out.
If you are still having trouble with this, either in the lab or elsewhere, contact your instructor for additional assistance.
•Quit Audacity.
•To check your work, drag the new file's icon to the Quicktime icon in the Dock, and play it when it opens in Quicktime.
On a Mac, you can also simply select the audio file and hit the Space bar to audition it.
•If there is something you want to change, open your Audacity file, make changes, and create a new file until you get one that sounds correct.
•If your file sounds right, submit the file to your Instructor according to the instructions for your course:
MIDI APPLICATIONS: Education: Post your mp3 file to your website, and include a link to it on your assignments.html page.
MIDI APPLICATIONS: Composition: Post your mp3 file to your website, and include a link to it on your assignments.html page.
MIDI APPLICATIONS: Jazz: Upload your mp3 file to the DropItToMe dropbox. See course site for directions. Do not submit an Audacity or other type of file.
INTRO TO MUSIC TECHNOLOGY: Upload your mp3 file to the DropItToMe dropbox. See course site for directions. Do not submit an Audacity or other type of file.
MODERN MUSIC TECHNOLOGY: Upload your mp3 file to the DropItToMe dropbox. See course site for directions. Do not submit an Audacity or other type of file.