Microphone Analysis
Audacity Recording Project
top instructions
Project Description
You are provided a dynamic microphone and an audio interface. You are asked to:
1) Connect the interface and microphone to the computer
2) Create a new Audacity session and configure it to receive input from the Pro Sono keyboard.
3) Using the mic, record a voice using the supplied script.
4) After recording, listen carefully to the recording and make an analysis of how the mic sounds taking into account mic distance and axis.
5) Log your analysis on a text document, and submit it for credit.
s1
•Acces an audio interface from your instructor.
A microphone needs to be connected to a device that does 2 things:
- a pre-amplifier that will increase the signal strength
- change the analog electric signal into a digital code
An audio interface does these, and will send the mic signal to the computer.
•Connect the interface to the computer via USB.
•Access a dynamic microphone and XLR cable from your instructor.
There are two basic types of microphones, dynamic and condensor. The main difference between the two is that condensor mics require a 48 volt charge, sometimes called "phantom power." The mics we use for this project in the lab are dynamic mics and don't need phantom power.
NOTE: `If you are doing this assignment in the lab, but not during class, ask the lab monitor for access to the mic cabinet. The dynamic mics are stored in the black pouches, and the XLR cables are in a box on the bottom shelf. The interfaces are available in their manufacturers boxes.
•In the lab, use an XLR cable to connect the mic to the XLR input on the interface.
If you are working outside the lab, and your microphone is a condensor mic, you must use an audio interface that supplies phantom power (most do).
•Make sure the interface you are using is powered.
s2
•Using the Audacity Recording Tutorial (linked at the top of the page), set up an Audacity session, and make a test recording.
Ideally, you will have already completed the Audacity Editing Project and are familiar with Audacity controls.
You do not need to keep the test recording.
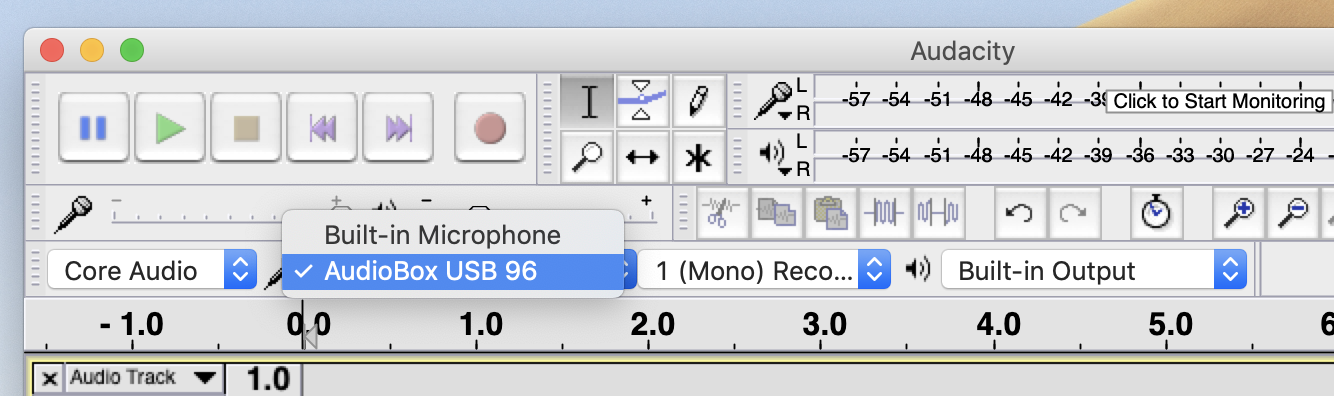
If you are recording in the lab using the Presosus Audiobox, you need to tell the computer which interface to record from. The computer has its own built-in mic, and Audacity will likely default to it.In Audacity, to employ the Audiobox, notice the four menus center of the window. These menus control Audio Host, Audio Input, Recording Channels, and Audio Output respectively.
With the Audiobox connected to the computer via USB, use the second menu from the left to select it as the audio source.
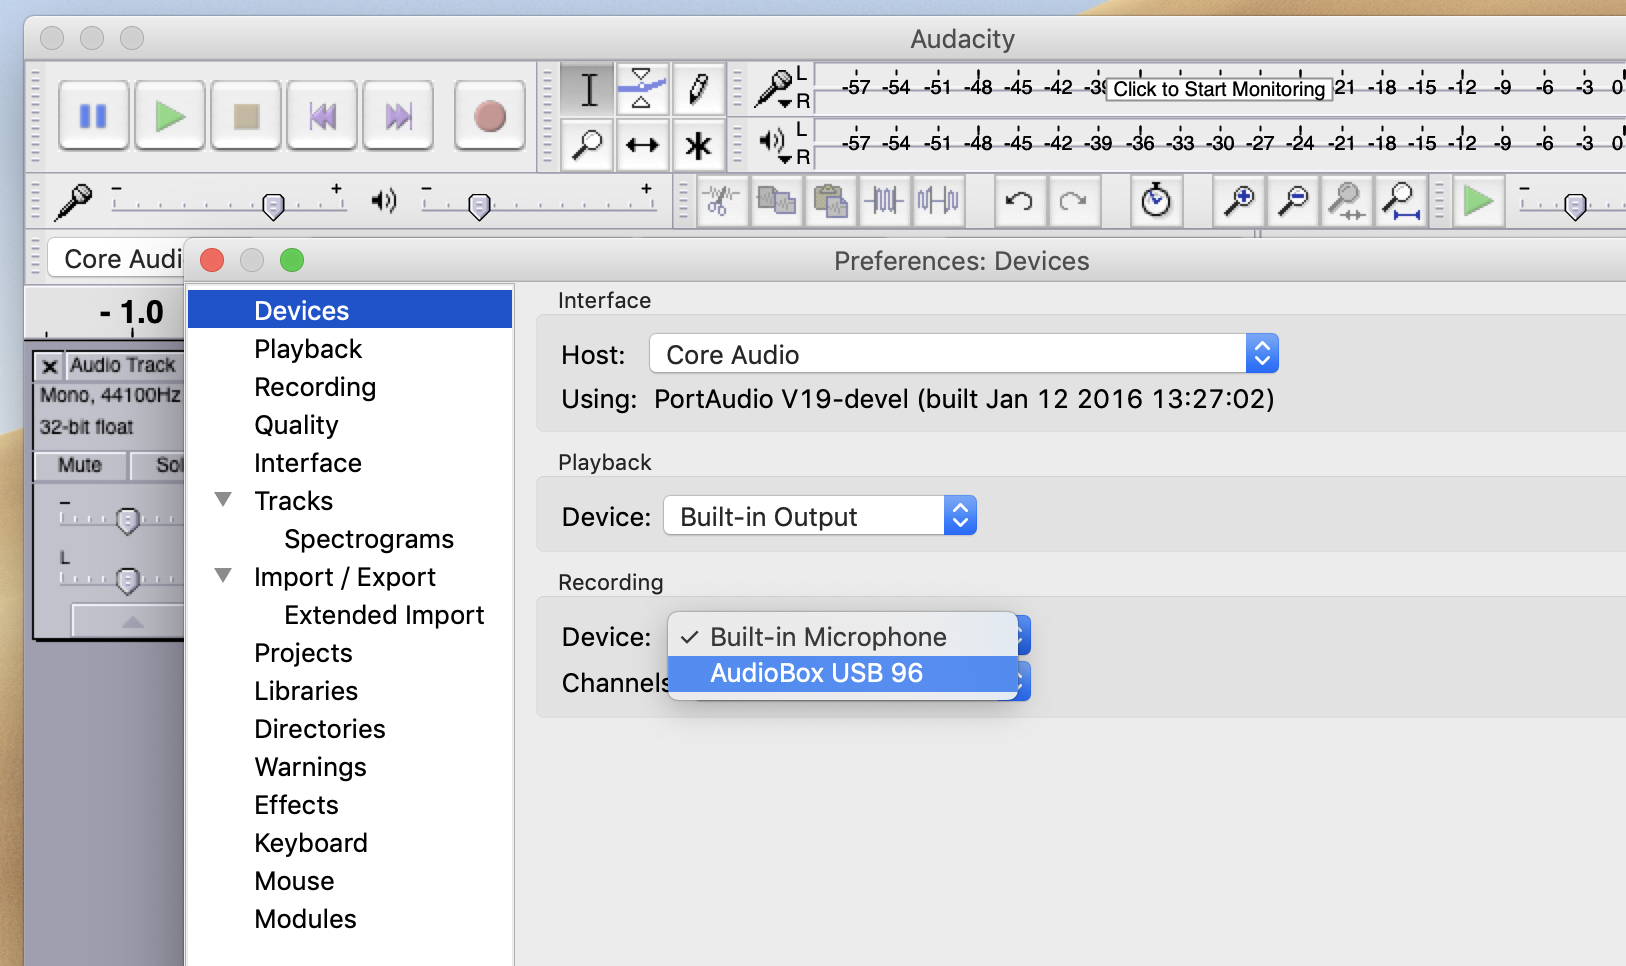
You can also change this setting (along with many other settings) in Audacity > Preferences > Devices.
s3
For this section, work with a partner. If you are working away from the lab, it's recommended you don't use your own voice, find a volunteer.
•Provide your partner a copy of the voice script.
•Have your partner talk into the mic. Check to make sure you are getting an input.
•Put Audacity into record.
With Audacity recording audio, have your partner read from the script and follow the instructions.
•When finished, hit the Stop button.
Make sure to save your file at this point.
•After recording the track, play it back and make sure you can hear it.
With this step complete, you might do the same on your partner's computer if the partner is working on the same project.
NOTE: At this point, make sure to backup your project. Be sure to backup the whole project, not just the Audacity file. The following steps don't require a microphone, so you could do them outside the lab with a computer and headphones.
s4
•Download the rtf version of the Voice Script from the link at the top on the page.
You might change the file name of this document to include your own name.
•Using headphones, listen back to each track you've recorded.
•Using the printed Voice Script, take note of how differences in axis and distance affect the sound, both in terms of loudness and quality.
•Open the rtf Voice Script file and put place your observations into the text of the script. Italicize this inserted text.
•Save your rtf Voice Script file.
s5
•Make sure your edited rtf Voice Script file has your name in the spot at the top.
•In D2L, go Activities > Assignments to open the D2L Assignments page.
•Click the appropropriate Assignment for your class to open its Assignment page.
•Click Add a File and follow the instructions to Upload your rtf file.
You do not need to upload the audio file or the Audacity file from your project.
•Make sure D2L has acknowledged that your File submission was successful.
You may receive a confirmation D2L email for your submission.