Music Technology Project
Project Description
You are a teacher and have been asked to create a tutorial on a music technology subject for your students:
1) Choose a topic of interest to you and your students
2) Research your subject and outline your tutorial
3) Using TextEdit and Screenshots, create a tutorial document
4) Step through your tutorial to check your work
Note: These steps assume you are using a Macintosh computer, either in the PSU MIDI Lab, or similarly equipped. You are free to use different equipment, but will need to find your own way to accomplish similar tasks.
Part 1: Choose and Research a Topic
--CHOOSE A TOPIC
•Spend a little time deciding on an application or process for which you would like to create a tutorial. Here are some examples--
Topics:
|
•These examples are only suggestions, you may choose one or do something different.
--RESEARCH YOUR TOPIC:
•Using available resources, including application manuals, PSU music technology resources, and other information found online, research your topic so that you have a clear understanding of the subject or process.
--CREATE A TUTORIAL FILE IN THE APPLICATION:
•If your topic involves an application, create a file that will demonstrate the subject or process.
Ideally, your application file would be simple, and demonstrate the process clearly. For example, if you are demonstrating how to use Hyperscribe in Finale, you might create a Finale file with a staff or two, then decide the music you want to enter. You might use Hyperscribe to enter some music to practice the process, then create a new, empty staff for your demonstration.
Part 2: Outline Your Tutorial
--DETERMINE THE SCOPE OF YOUR TUTORIAL:
•Based on your research, determine "how much" your tutorial will cover.
For example, if your subject is Hyperscribe, the scope of your tutorial might assume that a student knows how to open or create a new file in Finale, and you could start with "Open or create a new file in Finale," and then go through to recording a single 4-measure part.
The tutorial should not be overly complex. Be sure to limit the scope of your tutorial to a manageable size.
--MAKE A LIST OF BROAD STEPS:
•Based on your research, jot down a broadly general series of steps.
Don't be concerned with detail at this point, but do make sure that you include each necessary step. You may only have four or five broad steps.
--MAKE A LIST OF INTERMEDIATE STEPS:
•Based on your research, now fill in the blanks between broad steps with intermediate steps.
You still don't need to be perfectly detailed at this point. You just want a good outline of the process.
Part 3: Set Up a Tutorial Document
--SET UP A TUTORIAL DOCUMENT USING TEXT EDIT
•On your hard drive, create a new folder and name it Tutorial Project.
•Now open a text editing document on your computer. If you are on a Macintosh, go Applications>TextEdit to open the Text Edit Application. Create a new file and save it your project folder with the name Tutorial (we will rename it later).
TextEdit is a simple text editor that comes free with OSX Macs. If you are working outside the lab, you are welcome to use any word processing software.
•Type in your broad steps, and then your intermediate steps. Save your file.
•Now open the application file you created earlier. Put the file in a "starting" condition--the condition that the user would find their own file at the beginning of your tutorial.
Part 4: Enter Specific Steps
--ENTER STEP ONE
•Decide on the first step the user would take in your tutorial, and enter it in your document.
You want to keep your steps simple and clear. Don't assume your user knows much of anything about the application. Don't use shortcuts. For example, don't say "Save your file," instead say "In the menu bar at the top of your screen, find the File Menu and click on it to view it. In the File Menu, find and select Save to save your file."
You can use conventions once you have explained them. You could say "to do the steps mentioned above, we will use the convention File>Save."
•Do the step yourself, and check to make sure that you are describing the step accurately. If necessary, modify your step to match the actions you actually took.
--ENTER MORE STEPS
•Continue through successive steps, first entering, then performing, then editing.
--USE AND MODIFY YOUR BROAD AND INTERMEDIATE STEPS
•As you proceed through the tutorial, use your broad steps as section headers, and incorporate your intermediate steps into the steps themselves.
You may edit your broad steps to keep the main sections roughly similar in size and scope.
Part 5: Use Screenshots
--SETUP AND TAKE A SCREEN SHOT
A Mac using OSX provides a simple way to take pictures of portions of your screen, called "screenshots." If you are using a PC, there is an equivalent process. These instructions are specific to Macs--see below for instructions for a similar process on PC's.
•Find a place in your tutorial that would benefit from a visual example. Check your screen and make sure that things are exactly the way you want them to make your visual clear.
For example, move your mouse outside the section of screen that you are going to include.
•Hold down the Shift and Command keys, and hit the number 4.
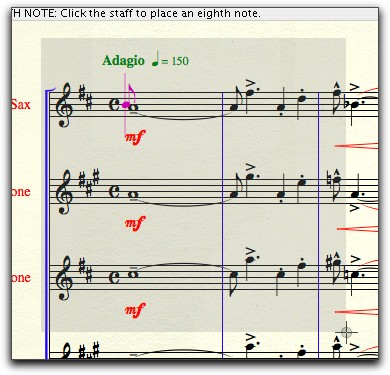
The cursor will turn into a cross-hair icon.
![]()
•Position the cross-hair icon to the upper left of the part of the screen you want to use. Holding down the mouse, drag down and to the right to enclose the desired visual.
This is tricky--once you start dragging, you can't change the position of your start point, and if you let go of the mouse, the picture will get taken. You can always start over by hitting the Escape key.
•Release the mouse. A screenshot will be created and saved to your Desktop.
The screenshot will be named Picture 1 (or some other sequential number). You can always rename the screenshot if you want.
By the way, the screenshots above were taken with some excellent software called Snapz Pro, not free but highly recommended.
--PLACE SCREENSHOTS INTO YOUR TUTORIAL
•Locate a screenshot icon on your Desktop, then simply drag it into your document in the required location.
Once the screenshot is in your document, you can drag it around, change its size, or edit text around it as needed.
This comes from a student familiar with PC's.
•Press the Prt Scr button on the keyboard, open up Paint, and hit Ctrl-V (paste, can also be done from the edit menu).
•You can also paste it in most other graphics editors but occasionally you'll get one that it won't work in. Paint comes with Windows so it's a safe bet for instructions.
--SAVE YOUR DOCUMENT
•Go File>Save to save your document.
Depending on how you saved your document before, you may be asked to resave your document with a different extension.
To save a document that contains graphics, the file extension .rtfd is required.
Hit Save with new name, and in the resulting window, name your new file Lastname.Firstname.Tutorial.
If you don't see the extension in the file name at the top of the window, uncheck the Hide Extension box, and notice that the extension .rftd has been added to your new file name.
Select your project folder as your location, and hit Save to save your new file to your hard drive.
--CHECK YOUR STEPS
•Starting at the beginning of your tutorial, go back over your steps and actually do what is described there. Think through the steps the way a user would, and edit your tutorial accordingly.
This is important. You will often discover that you have skipped over a seemingly obvious step, or that your language is confusing.
•When you are satisfied, save your document, but don't close it.
--CREATE A PDF VERSION OF YOUR TUTORIAL
To share files via email or on a website, you want to create a PDF document of your tutorial file. The following assumes you are using System 10.5 or later on a Macintosh computer.
•Check back over your file and make sure you like the way it looks. Once you have saved as a PDF document, you can't make changes without going back to your original file.
•Go File>Print to open the Print window.
You would also do this if you wanted to print. In that case, you would select a printer and hit Print. However, we can also use the Print window to save as a PDF file.
•In the lower left hand corner of the print window, access the PDF menu and select Save As PDF.
•In the resulting window, give your file the name Lastname.Firstname.Tutorial.pdf, locate to your project folder, and hit Save. Your file will be saved as a PDF format file.
•In your project folder, find the file you just made. Double click it to open it in a PDF viewer. Check your PDF file before proceeding, and, if necessary, repeat these steps until you have a file you like.
--TURN IN YOUR ASSIGNMENT:
•To turn this assignment in, print a hard copy to hand in to your instructor, and also post the PDF to your web site with a link on your assignments page.
•Make sure to check your class's Term Plan page for any additional forms or other requirements for this assignment.
•You will receive extra credit if you duplicate your tutorial as an HTML page. This is not easy, but very cool if it can be managed.
Portland State University