Digital Audio Editing Project -- Digital Performer vs. 7
top instructions
Resources:
Script: C W E Q I M V A P F T K J Z U B R D H X G O S N Y L
Standardized Digital Performer Preferences
Bouncing audio in Digital Performer
Exporting audio in Digital Performer
Version of this project that incorporates recording
Project Description
You are given a list of letters in random order. You are asked to:
1) Import an audio file of the alphabet read out of order
2) Edit the letters in an audio editing program, putting them in alphabetical order
3) Pan the letters alternately left and right
4) Put reverb on the letters panned right
5) Create a stereo mix of your track
6) Create an mp3 of the result and post to the Internet
Part 1: Import an Audio File
--DOWNLOAD & CONFIGURE PROJECT FILES
•From the link at the top of the page, download the Project Files to your work folder.
•Unzip the downloaded file.
Notice that this results in a "project folder" (Alphabe Edit Project) that includes a Digital Performer file and two folders labeled Audio Files and Analysis files. Make sure to keep the items in this folder intact, and if you move the project make sure to include the entire folder, not just the DP file.
•Now download the Voice Audio File.
Place the file into the project folder itself, not the Audio Files folder.
•From the project folder, open the Digital Performer file (alphabet.perf) by dragging its icon to the DP icon in the dock.
In the open file, notice that in addition to the Conductor track, the sequence contains three mono audio tracks.
•In the project folder, find the downloaded audio file (alpha.aif).
•Carefully drag its icon into the first measure of the top audio track (Alphabet).

Notice that a waveform will appear after a few seconds. DP is "importing" the audio file, copying it to the Audio Files folder, and possibly changing its format.
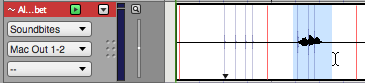
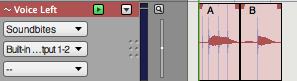
•On the right-hand side of your main window, drag the "dimple" to the left to open a panel. From the panel menu, select Soundbites.

Notice that you can see the audio file you just imported, represented as a mono, 16-bit file. Information on duration and hard drive location are also included.
•Now look in the project folder in a Finder window, and open the Audio Files folder.
Notice that the audio file has been copied into that folder. It is this copied file that DP references during the following edit process.
Part 2: Edit an Audio File in Digital Performer
When you record or import audio into a DAW like Digital Performer, a file is placed in the Audio Files folder inside the project folder. The audio from the recording is not "contained" in the Digital Performer sequence; rather DP "points" to this separate audio file.
When you edit audio in DP, you are not altering the original audio file. Instead, you are simply choosing different ways for DP to refer to this original file. The "edits" are what is saved with the DP file. The term for this is "random access" or "non-destructive" editing.
--USING THE SEQUENCE EDITOR
•In the main DP window, pull up the dimple at the bottom of the main window to create a new panel, then click the Sequence tab at the top of the new panel.
The Sequence Editor is where we edit audio tracks. It also shows other types of tracks, including MIDI tracks.
•In the panel on the right, pull up the dimple at the bottom a new panel, then select Track Selector from the new panel's menu.
You should see the names of your tracks. If you don't click in the Sequence panel to "focus" it.
•In the Track Selector panel, option-click the Alphabet track name in the Track Select column.
Option-clicking in the Track Selector column will show the clicked track and hide all others.

In the Sequence panel, you will see a waveform that represents the mono audio track that you just recorded. If you don't see it, make sure you have relocated to the beginning of your sequence and are in fact showing the Voice Record track.
•Notice the zoom buttons. Click on the Left-Right, Up-Down buttons to see how zooming affects the way the waveform looks.
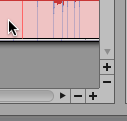
Hold down the Command key and hit left-right and up-down arrows to zoom horizontally and vertically respectively.
•Hit the space bar to put the sequence in play. Listen to the track as you watch the waveform.
The audio is the alphabet in random order.
C W E Q I M V A P F T K J Z U B R D H X G O S N Y L
--EDIT AN AUDIO SOUNDBITE
•Double-click the waveform in the Voice Record track to "pop-edit" the track.
Your cursor turns into an I-Beam tool.
In Digital Performer, to select data within a waveform, it helps to put it into pop-edit mode.
You should be able to see where a letter stops and ends by looking at the waveform.
•Drag the I-Beam over the first letter in the waveform to select it.
Depending on your preferences, you may hear the audio play when it has been selected. You can always option-click the space bar to play a particular selection. This is true for MIDI, too.
•With the letter selected, go Edit > Split to split the audio at the edges of the selection.
The selection becomes a "soundbite" of its own.
Soundbite is a generic term for any audio file, or discrete portion of an audio file, that is currently available to this DP session.
Look in the Soundbites panel and notice that three new soundbites have been created.
•In the new soundbite, option-click its name. The name will pop-edit. Rename it C.
Notice that the soundbite is renamed in the Soundbites panel, too.
•Continue through the audio track, splitting and renaming the sections representing each letter.
--REORDER YOUR SOUNDBITES
Now you want to put the letters in alphabetical order.
•First, make sure the Edit Grid button in the upper right corner of the Sequence panel is deselected.
With Edit Grid on, DP will restrict dragged files to an even "grid" based on beats or some other resolution.
•Focus the Sequence panel, the go to the Track Selector panel and click on the names of the other two audio tracks.
The new tracks will appear in the Sequence panel.
If necessary, use the zoom buttonsand/or bottom dimple to manage your window space. You can change the height of each audio track by dragging the bottom edge at the left side of the track.
•Find the soundbite named A, and drag it down to the Voice Left track.
•In the Voice Left track, click once on the A soundbite to select it.
•Hold down the Control key and "throw" the soundbite to the left.
If will jump all the way to the beginning of the file.
•Now do the same with B.
When you throw B, it will butt up against the A soundbite.
•Continue through the alphabet, putting all the soundbites in alphabetical order in the Voice Left track.
--MOVE ALTERNATE SOUNDBITES TO ANOTHER TRACK
The instructions ask us to pan alternate letters left and right, and to add an effect to soundbites panned right. The easiest way to do this is to put alternate letters on separate tracks.
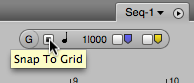
•First, enable the Snap to Grid button in the upper right corner of the SE window.
With Edit Grid on, DP will restrict dragged files to an even "grid" based on beats or some other resolution. We want to do this to keep dragged letters in their original position. Notice that the currently selected grid is probably set to a quarter note. You can change that, but you don't need to here.
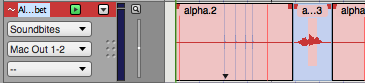
•In the track Voice Left, find the soundbite representing the letter B. Click it once to select and highlight it.
•Drag the soundbite B straight down to the track Voice Right.
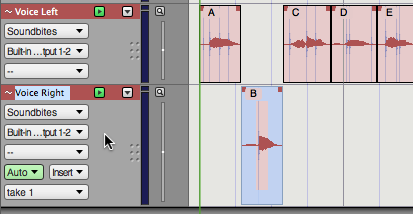
Notice that because of the Edit Grid, it doesn't move left or right, which is what we want.
•Do the same with all even-numbered letters.
You could select all remaining alternate letters by holding the shift key as you click on successive letters. When your selection is complete, you could then drag all letters together.
Part 3: Using Mixing Board Controls
--PAN THE TRACKS
Pan is a control that allows us to position a sound in the left and right panorama of a stereo image. In Digital Performer, we set this control in the Mixing Board.
•Go Project > Mixing Board to open the Mixing Board.
We want the Mixing Board to open in its own window. If it opens in the main window, focus it, then go Control-1 to move it into its own window. You can then resize it if needed.
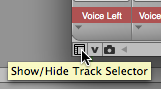
•If necessary, use the Show/Hide Track Selector button in the lower left corner of the Mixing Board to reveal its Track Select column.
•In the Track Selector Column, click as necessary on the three tracks names to show mixer strips for the tracks in the Mixer.
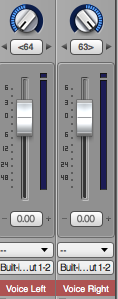
•Find the Pan control for the Voice Left channel-strip, and drag it all the way to the left to "pan left."
The Pan control is the knob just above the volume fader in each channelstrip.
•Now find the Voice Right Channel strip and pan it all the way to the right.
•Find the Voice Record mixer strip, and click its Mute button to highlight it.
This silences the track. Make sure the other two tracks are not muted.
•Play your track and notice how pan affects playback.
We can add effects to individual tracks in the Mixing Board window.
--ADD AN EFFECT PLUG-IN
•As before, open the Mixing Board in a separate window, and make sure you can see channelstrips for Voice Left and Voice Right channels.
•In the channelstrip for Voice Right, notice the horizontal "slots" at the top of the mixer strip. Click and hold on the top strip to access a menu of all available plug-ins.
Notice the various plug-ins available in Digital Performer. There are many ways to affect the sound of an audio track here.
•Select MOTU: eVerb (mono to stereo), and release the mouse to place the eVerb plug-in into the Voice Right mixer strip.
The eVerb window will open.
•In the eVerb window, access the small preset menu at the top left of the window.
This menu provides a list of "presets" for this effect plug-in. You can often use presets as a starting point when using effects. You can also make changes, and save your changes.
•From the presets mini-menu, select Concert Hall > Hall with Tiles to load this preset into eVerb.
•Find the Mix knob. Just below it, enter the number 25 to set the effect percentage to 25%.
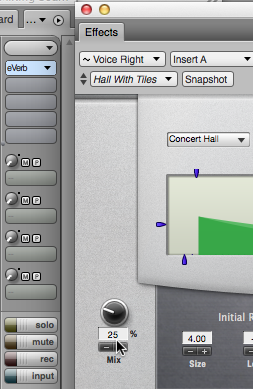
This creates a mix of 75% unaltered sound, and 25% processed (reverberated) sound.
•Play your track and notice the effected sound on the right channel.
--BOUNCE YOUR MIX
Bouncing audio in Digital Performer is a big subject. Luckily, we have a tutorial for it.
•Using the tutorial posted here, bounce your audio to disk.
You can bounce your audio to several different formats. For this assignment we recommend bouncing to project format, then using Export to create both an aiff and an mp3 version as described in the tutorial. There are several other ways to do this, which we will discuss in class.
--USE EXPORT TO CREATE AN AIFF AUDIO FILE
AIFF is a standard format typically used on Macintosh computers, though it will also play on PC's. It is a format that you can use to burn an audio CD, and also you can change the format to something Internet-friendly like MP3.
•Using the tutorial posted here, export your bounced mix as an aiff formatted file.
--CREATE AN MP3 FILE AND POST TO YOUR WEBSITE
On the Internet, file size is important. AIFF files are large. We want to create a file in a "compressed" format like MP3, with roughly 1/10 the file size of AIFF.
To do this in DP requires a third-party file called a LAME Framework. This should already be installed on your MIDI lab computer, but if you are doing this at home or in another application, you may have to install that file yourself.
•Using the tutorial posted here, export your bounced mix as an mp3 formatted file.
FYI, in the past, exporting as an mp3 in Digital Performer was not always reliable. You might also consider creating an mp3 file of your mix by using the AIFF file you made above, and following the instructions in Using iTunes to Create MP3 Files or using some other 3rd-party conversion tool (e.g. Snapper).
•Using any of the methods discussed here, create an mp3 file of your Alphabet Mix, and post it to your website, linked from your website's assignments page.