Tools and Appliances
A virtual machine is an environment that mimics a specific computer system. In this course, we will use a virtual machine that mimics the Ubuntu Linux operating system, irrespective of the operating system you currently have on your computer. (Note: All software we use in this course is free for educational purposes.)
1 Installing this course's virtual machine on your computer
- I have prepared a virtual machine for this course and shared it
with you in Google Drive (check your email). Download it while
you are connected within or remotely signed into the university's
network. After the download, you should have a virtual machine
file in the OVA format whose name ends with
.ovaand whose size is about 2 to 3 GB. - Go to https://www.virtualbox.org and download Oracle's
virtualization software called VirtualBox (version 5.0 or
higher). Install it on your computer following their
instructions. (It should be easily installable on computers
running Windows, Linux, Macintosh, or Solaris.) You need to know
the meaning of these basic virtualization terms that they will be
using:
- The Host is the machine which will run the VirtualBox (which will be your computer).
- The Guest is the operating system that you run will inside the VirtualBox (the above-mentioned Ubuntu linux).
- Open the just installed VirtualBox. Then, from its menu bar, click on
File -> Import Applicance.
Provide the location where you downloaded and saved the OVA virtual machine file. The imported virtual machine will be listed in Oracle VM VirtualBox Manager as
MyUbuntuVirtual....Some caveats:
- You may need to use the Settings menu of Oracle VM VirtualBox Manager to make sure that the virtual machine is not using unusually large memory or disk space compared to what is available on you computer. Otherwise it may not start up in the next step.
- If your host is also Ubuntu linux and you have never used
VirtualBox previously, you might need to quit VirtualBox,
type
sudo apt-get install dkms, andsudo /etc/init.d/vboxdrv setupon a terminal, and then reopen VirtualBox before proceeding to the next step.
- In the Oracle VirtualBox Manager, select the machine, and click start. You should now have a window, within which everything emulates a computer running the Ubuntu linux operating system. The software we need for this class is already installed on this system.
- You will occasionally need the login and password for this
virtual machine:
Username: ubox
Password: check your email
- When you need to stop the virtual machine, click on the icon in the top right of your Ubuntu Virtual Machine window and click Shut Down.
2 Getting acquainted with Netgen
Netgen is a mesh generation program that you will find inside the virtual box.
- Open a terminal in your virtual machine. Type
cd /opt/netgen/share/netgen
netgen
- You should now have a Netgen window with many menu buttons. Click
File -> Load Geometry
and load any of the files ending in
.geoor.in2d. These files contain geometry specifications. Then click the Generate Mesh button to see a mesh being generated.
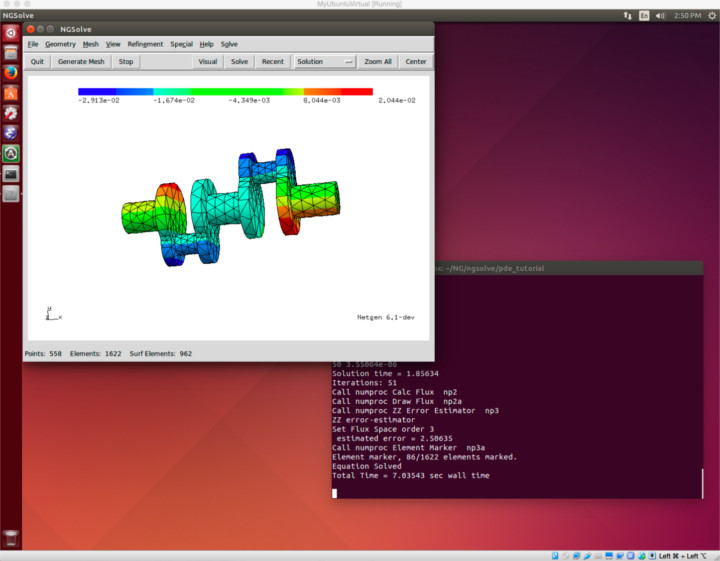
Figure 1: Screen shot of a Netgen window inside the virtual machine.
3 Getting acquainted with NGsolve
NGsolve is a finite element program that you will find inside the virtual box. It uses Netgen for mesh generation.
- Open a terminal in your virtual machine. Type
cd /opt/netgen/share/ngsolve
netgen
- In the Netgen window, you should see two
Solvemenu items, one in the top menu bar and another as a button below. Click on the first one (in the top bar)Solve -> Load PDE
and pick any of the demo files (ending in
.pde) to load. Now, click the Solve button in the second menu line. You should see the NGSolve program solving a boundary value problem using finite elements. The problem being solved is specified in the PDE file you loaded.
4 Beyond the virtual machine
You can install Netgen and NGsolve on your computer directly (and use it without the virtual machine). The virtual machine is provided so that we do not waste class time on such native install issues.
However, if you get interested enough in these programs after trying it out in the virtual machine, then you may eventually want to consider downloading these packages from SourceForge's netgen site and ngsolve site on your own time. Some installation instructions and further documentation can be found in this wiki.
5 Homework
- If you are not familiar with the Ubuntu operating system, please read up and become familiar with it. (Use the virtual machine you installed as your playground for learning.) You should gain familiarity with basic unix and linux style commands by finding materials online such as the Unix Tutorial.
- Read the mesh generation documentation:
cd ~/NG/netgen/doc
evince ng4.pdf
Make two and three dimensional geometries as you please and mesh them.
- Navigate to
~/NG/ngsolve/doc/quickstartand readquickstart.pdf. Check out other files in the documentation folder (and be warned that some are outdated). - You can interact with NGsolve in either C++ or in python, as we will see later. Briefly familiarize yourself with both languages, for instance using this Python Tutorial and this C++ tutorial.